


Home My Tools image background remover Image Optimizer Free OCR...
Read More
🚀 Turn Your Images into The Ultimate Image Optimizer and Editor
Websites that take a long time to load annoy your visitors and damage your search rankings. The culprit? Often, it’s oversized, unoptimized images that are slow to load. Whether you run a blog, an online store or a personal portfolio site, the images on your pages are just as important as the words themselves when it comes to the user experience — and they’re also often responsible for the bulk of a page’s download size.
The Image Optimizer and Editor is an advanced online tool created for all users to help fix common image issues. This one-stop shop allows you to upload your photos and make basic edits like resizing, quality adjustments, cropping, brightness/contrast tweaks, color changes and changing file format — all without the need for expensive software or technical know-how.
We want to take a closer look at this versatile tool in our guide on how you can optimize your image workflow and generate perfectly optimized images for any situation.

📈 Why Image Optimization is Important in Your Website
Images make up around 60% of the size of an average webpage, which means they are the largest contributor to how long your website takes to load. Oversize images or those saved in the wrong format cause bottleneck that slows down your entire site.
Page speed is a ranking factor to search engines such as Google. All of which is to say that it’s not just a matter of annoying your site visitors; poorly optimized images actually are bad for you in search. Mobile users, who now constitute over half of web traffic, are particularly sensitive to slow-loading pages.
Not only that, but correctly sized and formatted images, help your content look good across different devices. A photo that is crystal clear on desktop can look like a bunch of rectangular blobs on mobile if it isn’t optimized properly.

🛠️ Highlighted Features of Image Optimizer and Editor
⚖️ Size and Quality Control
The tool allows you to dial in the dimensions of your image and its file size. You can shrink those large images to a size that is most suitable for web without compromising on visual quality, or if you prefer, blow them up when a small image just won’t do. The quality adjustment function helps you to create smaller files with better image clarity.
🎨 Advanced Editing Capabilities

As well as basic resize options, the editor also features pro-quality tools for tweaking your shots:
✂️ Cropping Tools: Crop your image to remove unwanted parts or change the aspect ratio in order to fit certain dimensions such as for Instagram, social media posts, website headers, etc.
💡 Light & Contrast: Balance out the lighting in your shot and make your photo pop. These are controls for repairing photos made under poor lighting.
🔍 Sharpening: Improve image focus and detail, great for product photography or portraits.
🎨 Color Adjustments: Adjust colors, saturations and hues to coordinate with your brand or simply to create moods across different types of images.
🔄 Format Conversion
The program can convert between all popular image formats:

JPG: Best for photographs and complex images with many colors
PNG: Suitable for graphics with transparent backgrounds and/or lossless quality photos
WebP: Google’s newer format that gives a great compression with the same quality.
BMP : Uncompressed mode for best quality applications
Each of these fits different needs, and it’s trivial to switch between them using the tool.
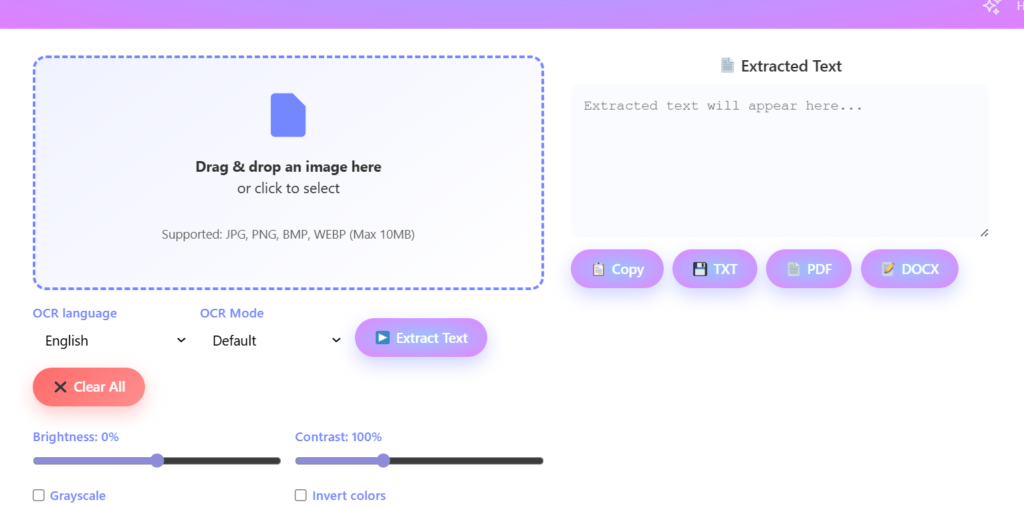
📖 How to Use the Image Optimizer & Editor
The tool is easy to use and operates directly on web, there are no download or installation required.
🚀 Getting Started
Open the Image Optimizer & Editor site and use the upload file button or drag-n-drop to add your image. The tool supports most popular image formats and file size too.

✏️ Making Your Edits
When your image uploads, you’ll get a sidebar with all of the available editing functions. Begin with some easy tweaks such as resizing if you need a different size. – Set the quality slide value to get more compression of file size when previewing image results.
In regards to visual editing, play around with the brightness, contrast and sharpening tools. These adjustments are made as you adjust them so that you can see what affect they will have on your image. You can use the cropping tool to indicate where specifically to keep across your image (great for thumbnails or obfuscating distracting stuff).
💾 Saving and Downloading
Select the format you want from the output format options, after editing your content. Hit “Compress” and the tool now work its magic, finishing up by giving you a download link for your new tiny image. You can contrast both the original and edited photos to see how much you’ve improved.
🏆 Best Practices for Optimized Images
🖼️ Choose the Right Format
For graduations of flat colours for photographs and graphics, use JPG. PNG has the best support for those and is a (good enough) container format with transparency. WebP compresses better than anything else for modern websites, but not all browsers support it yet. BMP is for when you need publishing or best quality, and not just for the jpeg itself.

🌐 Optimize for Your Platform
Different platforms have different requirements. Images are often compressed more on social media sites so it pays to start with a better quality image to begin with. Crisp product photos that load fast on mobile devices are crucial for e-commerce sites. Blog posts need to feature images that are big enough to be interesting, but small enough not to slow down page load times.
⚖️ Balance Quality vs File Size
Keep aiming for the lower file size that has acceptable quality. This would normally involve exploring the quality settings. For web, most images don’t need to be larger than 1920 pixels wide — and lots can be a lot smaller, depending on how they’ll get used.
👥 Consider Your Audience
Internet for mobile users is frequently slower, so it’s even more important to keep file sizes small. On high-res screens, though, they will see if your images are too compressed or tiny. The preview feature of the Image Optimizer and Editor lets you find that middle ground for your followers.
🔄 Maintain Consistency
Establish Your Photograph as a Standard. This could be something like consistent header sizes for all blog posts, or the same brightness and contrast edits across all of your product images. Repetition will make your website (or social media) look pro.
💡 Pro Tips For The Best Results

🔍 Use Sharpening Strategically
Sharpen after resizing It softens the details. Just one thing, don’t over-sharpen your image so it’ll give a realistic look and not have visible artifacts.
🧪 Test Different Formats
One format is not always best. You can try a number of formats and adjust how much compression you want to make for the optimal quality/file size ratio that suits your purposes.
📂 Batch Processing Strategy
If you’re working with a group of similar images, write down or remember the settings that seem to work and apply them to another. This is a time saver and helps to maintain consistency throughout your image library.
✨ Maximize Your Image Impact

By using the Image Optimizer and Editor, image optimization is reduced from a complex process that rumour has it includes more than 200 parameters to just a few mouse clicks. And while offering powerful optimization capabilities, it does what no other software can do simultaneously; combining features of the popular editing and text tools.
Whether you’re a blogger trying to reduce your website’s load time, a small business promoting your products on the cellular web, or a social media manager reaching out with useful and appealing content, no tool is more handy for quickly optimizing professional, fast-loading images in every size for all devices.
Begin to optimize your images now and see what a difference an appropriately sized, formatted and enhanced image can do for your online presence. Your visitors — and your search rankings — will thank you for the quicker, more professional experience.

Img Optimizer and Editor
Home My Tools image background remover Image Optimizer Free OCR...
Read More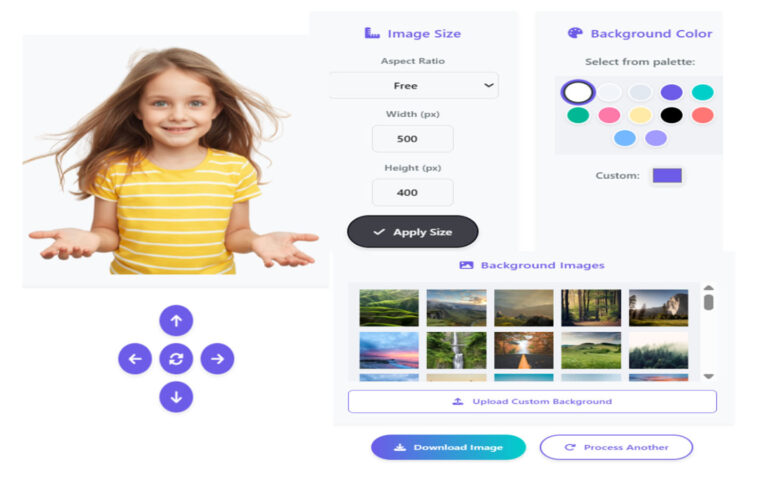
×